Welcome to part two of a four-part series where I share my experience of helping the loveable Brutus with the help from the amazing O&P technician students from St. Petersburg College School of Orthotics and Prosthetics Technology.
In October 2021, I presented a unique clinical case to the students at the St. Petersburg College (SPC) School of Orthotics and Prosthetics Technology. I showed the students the negative impression of Brutus’ right hind leg and asked if they would help “fabricate a custom knee orthosis for a two-year-old who tore his cruciate ligament while hiking.” The students were a bit baffled. They asked, “We didn’t think a two-year-old could tear his or her cruciate ligament. How did this happen?” So, I told them about young Brutus, who is a 108 lb bull mastiff and Certified Service Dog who tore his right hind leg cruciate ligament while hiking a month earlier. Brutus’ veterinarian suggested surgical intervention or bracing. Because I am a Certified and Licensed Prosthetist Orthotist and member of the SPS Clinical Team, my sister gave me a call.
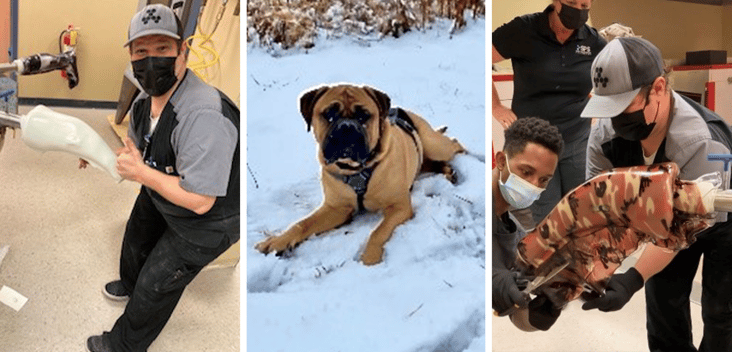
I explained the clinical evaluation and assessment process to the SPC O&P Technology students, and discussed with them the fabrication process from start to finish. After that, it was all hands on deck! The students were excited to begin fabricating Brutus’ custom knee orthosis.
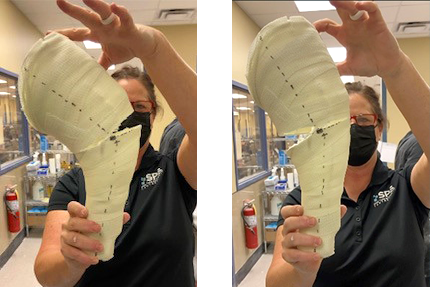
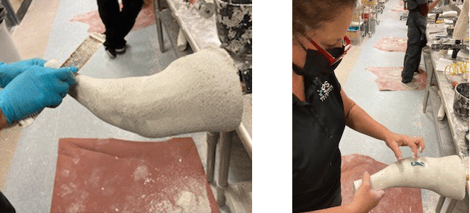
In these pictures, you can see how to correct the alignment of the negative impression of Brutus’ limb. Because Brutus was in a lot of pain during the initial evaluation, he was very guarded and flexed his knee about 20 degrees from neutral. For optimal biomechanical alignment and stabilization for his activities of daily living, we cut the negative cast and realigned it to Brutus’ neutral knee position.
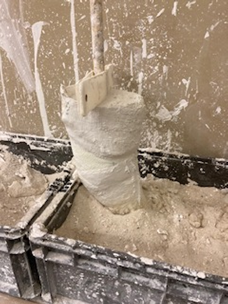
The students and I wrapped the negative mold with plaster wrap to maintain the adjusted knee alignment for the custom knee orthosis, and poured plaster into the negative mold and stabilized it in a sandbox to create a positive mold of Brutus’ limb for fabrication.
Once the plaster hardened, we modified the positive mold and prepared it to add knee joints for stability and unrestricted range of motion. We used Becker Orthopedic’s Tamarac Flexure Joints and an AliMed's Aliplast soft interface to protect Brutus’ anatomy. For the primary anatomical and biomechanical stabilizers to protect Brutus from further injury, we used New Limbits’ polypropylene with camouflage heat transfer paper.
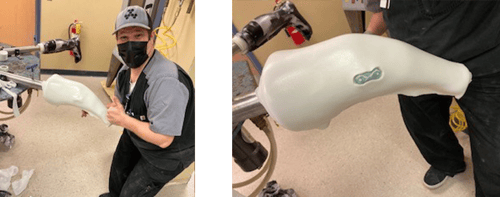
The Director of SPC's School of Orthotics and Prosthetics Technology, Tim Fair, LCO, CPO, demonstrated to the students how to heat and pull the Aliplast material over the Becker Orthopedic Tamarac Flexure joints on the positive mold, then exposed the joints for improved cosmesis and overall fitting of the finished joints.
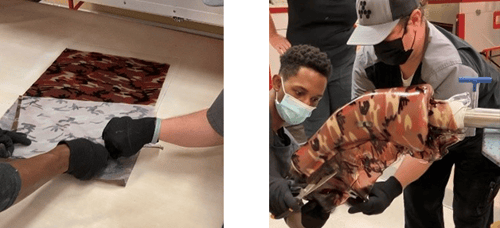
Tim and the students then placed the camouflage heat transfer paper on the oven heated polypropylene, ensuring a complete transfer of colors to the plastic to give the custom knee orthosis a more finished look. He assisted the students with the process of removing the hot polypropylene from the oven and pulling it over the positive mold using a vacuum system, which helps to maintain the structural integrity of the thermoplastic as it conforms and cools evenly over the entire positive mold.

Once the heated polypropylene with the camouflage transferred colors cooled on the positive mold, I was able to create the final custom knee orthosis trim lines, which had been measured during the initial evaluation and assessment of anatomy with Brutus. I then removed the molded material from the positive mold. I encouraged my eager colleague and SPS Sales Manager, Steven Hunter, to join in on the fun. Steven used an oscillating cast saw to cut through the conformed thermoplastic and along the trim lines I had drawn on the mold.
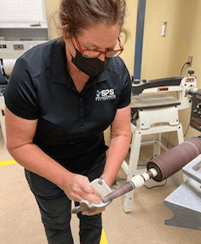
In this picture, final adjustments are being made to the thigh and calf sections of the custom knee orthosis for Brutus. I used a floor carver with variable speeds and various attachments to smooth the edges of the conformed thermoplastic. This stabilizes the limb during Brutus’ day-to-day activities and helps to protect the limb from potential skin irritation.
The final stage of fabrication was securing the finished Becker Orthopedic Tamarac Flexure Knee Joints with Loctite to the custom knee orthosis, double-checking the alignment and trim lines, as well as cleaning off any leftover debris from fabrication.
The custom knee orthosis was then ready for Brutus! Steven, Brutus, Brutus’ parents, and I would like to give a special thank you to Tim and the attending students who helped with the successful fabrication of Brutus’ custom knee orthosis.
Ready for part three? Sign-up for the SPS Newsletter to be notified of the next installment.

See also:
Part 3: Final Delivery of Custom Knee Orthosis for Bullmastiff With Ligament Injury
